
Introduction
Takeoff may appear easier than landing, but it is a demanding phase of flight. The aircraft accelerates rapidly, the controls change in effectiveness, engine and propeller forces affect direction, and the pilot must monitor performance while maintaining the runway centreline.
A successful takeoff does not begin when power is applied. It begins with performance planning, aircraft inspection, weather assessment, runway evaluation, checklist discipline, and a clear emergency plan.
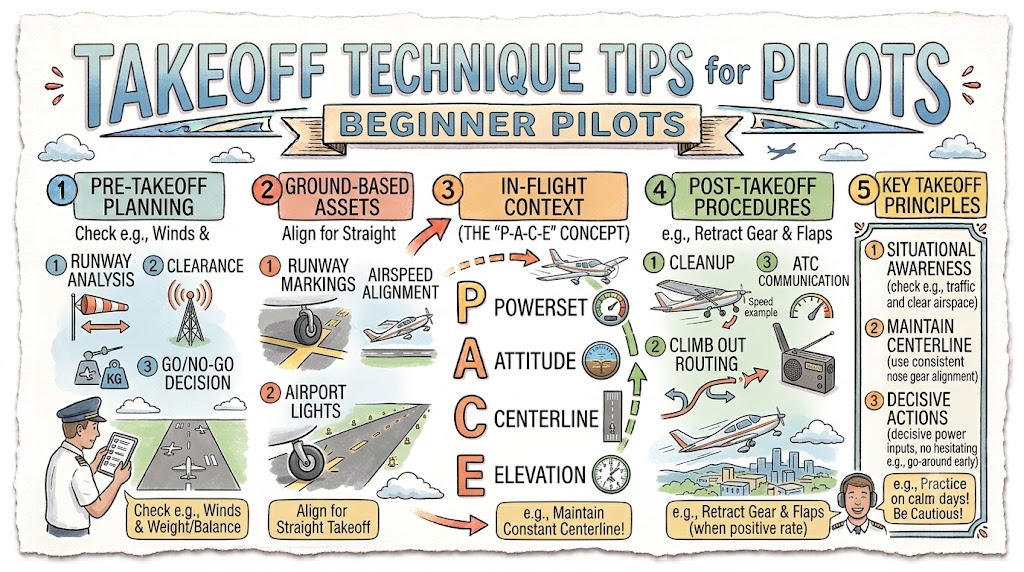
The takeoff can be divided into three stages: the ground roll, lift-off, and initial climb. Each stage requires accurate control of direction, airspeed, attitude, and aircraft configuration. The manufacturer’s Aircraft Flight Manual or Pilot’s Operating Handbook must always take priority over general flying advice.
This guide explains practical takeoff techniques for beginner pilots. Every manoeuvre should be practised with a qualified flight instructor and according to the approved procedures for the aircraft being flown.
Why Takeoff Technique Matters
During takeoff, the aircraft operates close to the ground and may have limited excess performance. A mistake involving airspeed, configuration, directional control, loading, or rotation attitude can quickly become serious.
EASA identifies several common contributors to loss of control during takeoff, including:
- Poor directional control on the ground
- Incorrect rotation speed
- Incorrect aircraft configuration
- Improper loading
- Excessive crosswind
- Incorrect rotation attitude
- Poor control during the initial climb
Good technique helps the student maintain control while also creating enough time and mental capacity to recognise abnormal performance.
Understand the Three Takeoff Stages
Takeoff Roll
The takeoff roll begins when the aircraft starts accelerating and continues until sufficient lift is produced for the aircraft to leave the runway.
During this stage, the pilot must:
- Maintain runway alignment
- Apply power correctly
- Monitor engine indications
- Confirm airspeed is increasing
- Use the rudder to control direction
- Apply crosswind correction
- Recognise abnormal acceleration
Lift-Off
Lift-off occurs when the wings support the aircraft’s weight and the wheels leave the runway.
In many training aircraft, the pilot produces lift-off by smoothly raising the nose to the recommended takeoff attitude at the specified rotation speed.
Initial Climb
The initial climb begins after lift-off. The pilot establishes the correct climb attitude, maintains the recommended speed, controls yaw and drift, and follows the planned departure path.
The three stages form one continuous manoeuvre. Pauses, abrupt control movements, or rushed configuration changes can disturb the aircraft during a critical period.
Complete Takeoff Performance Planning
Before flying, calculate whether the aircraft can safely depart under the expected conditions.
Review the performance charts in the aircraft handbook and consider:
- Aircraft weight
- Centre-of-gravity position
- Runway length
- Runway slope
- Surface condition
- Wind direction and speed
- Outside temperature
- Airport elevation
- Density altitude
- Obstacles in the departure path
- Required takeoff and climb distance
High temperature and high airport elevation increase density altitude. High density altitude can lengthen the ground roll while reducing engine, propeller, and climb performance. An aircraft may become airborne but still be unable to climb safely over nearby obstacles.
Do not rely only on the fact that the aircraft departed from the same runway on another day. Changes in temperature, weight, wind, runway condition, and aircraft performance can produce a very different result.
Check Weight and Balance Carefully
Aircraft weight affects acceleration, lift-off distance, climb rate, and obstacle clearance.
A heavily loaded aircraft generally requires:
- More runway
- A higher lift requirement
- More time to accelerate
- A reduced climb rate
- More distance to clear obstacles
The centre-of-gravity position also affects handling and stability. Complete an accurate weight-and-balance calculation using the manufacturer’s approved data.
Secure baggage and loose objects before departure. Items that shift during acceleration or climb can distract the pilot or affect aircraft balance. EASA specifically recommends checking seat attachments and securing objects before takeoff.
Inspect the Runway and Departure Path
Before entering the runway, confirm:
- The correct runway has been selected
- The runway is long enough
- The surface is suitable
- The takeoff path is clear
- No aircraft is approaching or departing
- No vehicle or person is on the runway
- The wind direction is understood
- Wake turbulence spacing is adequate
- The departure path is free from avoidable obstacles
Grass, mud, snow, standing water, and wet surfaces can increase takeoff distance. Contaminated surfaces can also reduce braking effectiveness if the takeoff must be rejected.
At a controlled airport, enter the runway only after receiving and understanding the required clearance. At a non-towered airport, follow the applicable communication and traffic procedures while maintaining a careful visual lookout.
Use the Pre-Takeoff Checklist
Beginner pilots should avoid performing important checks entirely from memory. Use the approved checklist and confirm every item.
Typical pre-takeoff checks may include:
- Flight controls free and correct
- Trim set for takeoff
- Flaps set as required
- Fuel selector correctly positioned
- Mixture set as required
- Engine temperatures and pressures normal
- Flight instruments checked
- Doors and windows secured
- Seat belts fastened
- Takeoff speeds reviewed
- Departure procedure reviewed
- Transponder and lights set
- Runway and approach path clear
The FAA recommends checking the engine instruments and confirming full, free, and correct flight-control movement before takeoff.
The exact checklist depends on the aircraft. A generic list must never replace the checklist approved for the specific aircraft.
Give a Clear Takeoff Safety Briefing
A takeoff briefing helps the pilot respond without wasting valuable time when something unexpected happens.
A beginner pilot’s briefing should cover:
- Runway being used
- Wind conditions
- Takeoff configuration
- Rotation speed
- Initial climb speed
- Departure direction
- Obstacle considerations
- Rejected-takeoff plan
- Engine-failure plan
- Immediate landing options
- Relevant emergency actions
A simple briefing may state that any problem identified while sufficient runway remains will lead to power reduction, braking, and a controlled stop. The plan for an engine problem after lift-off depends on altitude, terrain, wind, aircraft performance, and the manufacturer’s guidance.
The pilot should not invent emergency turns during the event. Suitable landing areas and practical options should be considered before power is applied.
Align Accurately With the Runway
When entering the runway, position the aircraft on the centreline and align the nose with the runway direction.
Check the heading indicator or directional display against the runway heading when appropriate. This can help detect entry onto the wrong runway or incorrect direction.
Look for distant reference points aligned with the runway. These may include:
- Runway centreline markings
- Runway lights
- Trees
- Buildings
- Towers
- Terrain features
Distant references help the pilot maintain direction during the ground roll and track the runway’s extended centreline after lift-off.
Apply Power Smoothly
Advance the throttle smoothly and continuously to the approved takeoff power.
Applying power abruptly can produce strong yaw and make directional control more difficult. In many single-engine propeller aircraft, torque, P-factor, slipstream, and other propeller effects create a tendency to yaw left as power and angle of attack increase.
Use the rudder as required to maintain centreline alignment. Do not wait for the aircraft to move significantly away from the centreline before correcting.
After applying power, check:
- Takeoff power is available
- Engine indications are normal
- No warning has appeared
- Airspeed is increasing
- The aircraft is accelerating normally
- Directional control is satisfactory
A failure to verify engine indications or recognise abnormal acceleration is a common takeoff error.
Keep Your Feet Positioned Correctly
In many training aircraft, the upper part of the rudder pedals operates the wheel brakes.
During the takeoff roll, keep your feet positioned so that you can use the rudder without unintentionally pressing the brakes. Accidental braking can slow acceleration, create a swerve, and increase the takeoff distance.
Directional control should normally be maintained with the rudder rather than repeated brake use once the takeoff roll has begun. The exact steering arrangement varies between aircraft types.
Maintain the Runway Centreline
Do not accept a takeoff roll that continues along one side of the runway.
Use small, timely rudder inputs to keep the aircraft:
- On the runway centreline
- Pointing in the runway direction
- Moving without unnecessary side-to-side corrections
Avoid overcorrecting. Large alternating rudder inputs can create a series of swerves and increase the risk of losing control.
As airspeed increases, the rudder becomes more effective. The amount of pedal pressure required will therefore change during the takeoff roll.
Do Not Fixate on the Airspeed Indicator
The airspeed indicator is important, but it should not receive the pilot’s full attention.
Maintain an effective scan between:
- The runway centreline
- Distant directional references
- Engine indications
- Airspeed
- Aircraft attitude
- Nearby traffic
- Wind effects
Fixating inside the cockpit can allow the aircraft to drift, yaw, or develop an incorrect wing attitude.
The FAA identifies reliance solely on the airspeed indicator and limited visual scanning as common errors during takeoff and initial climb.
Rotate at the Recommended Speed
Rotation should begin at the speed specified in the aircraft handbook or training procedure.
At the rotation point:
- Confirm directional control.
- Apply smooth back pressure.
- Raise the nose toward the recommended takeoff attitude.
- Continue controlling yaw with the rudder.
- Allow the aircraft to lift off normally.
Avoid pulling sharply. Excessive back pressure can create an unnecessarily high angle of attack, increase drag, delay acceleration, and place the aircraft close to a stall.
Do not try to force the aircraft into the air before it is ready. Premature rotation may result in poor acceleration, unstable lift-off, or weak climb performance.
Establish the Correct Initial Climb Attitude
After lift-off, transition smoothly to the recommended climb attitude and airspeed.
A beginner pilot should use the outside horizon to establish attitude and then confirm performance with the flight instruments. Avoid rapidly moving the nose up and down in an attempt to chase an exact airspeed indication.
The aircraft’s attitude should be adjusted smoothly. Allow time for the airspeed to respond before making another correction.
Maintain:
- The recommended climb speed
- Coordinated flight
- Runway track
- A safe pitch attitude
- Proper engine indications
- Effective traffic scanning
EASA warns against increasing back pressure when an aircraft is slow after takeoff, because this increases the angle of attack and can worsen an approaching stall.
Understand Vx and Vy
Two important climb speeds commonly taught to student pilots are Vx and Vy.
Vx: Best Angle-of-Climb Speed
Vx provides the greatest altitude gain over a given horizontal distance. It may be used when obstacle clearance is the main concern.
Vy: Best Rate-of-Climb Speed
Vy provides the greatest altitude gain in a given amount of time.
The correct values are specific to the aircraft and may change with altitude, weight, and other conditions. Use the speeds and procedures published in the aircraft handbook.
Small deviations from the recommended speed can significantly reduce climb performance in some aircraft, especially during a maximum-performance departure.
Avoid Remaining Too Slow in Ground Effect
Ground effect reduces induced drag when an aircraft flies close to the surface. This can allow an aircraft to become airborne before it has enough speed for an effective climb away from the runway.
A premature lift-off may leave the aircraft flying a few feet above the runway but unable to climb safely.
When this happens, pulling back is not the answer. Increasing back pressure raises the angle of attack and adds drag. The aircraft normally needs to accelerate to the recommended climb speed while remaining under positive control.
High weight, high temperature, and high density altitude make this situation especially dangerous.
Apply Correct Crosswind Technique
A crosswind affects the aircraft during the ground roll, lift-off, and initial climb.
At the beginning of the takeoff roll, the normal light-aircraft technique generally involves applying aileron into the wind. This helps prevent the upwind wing from lifting.
As the aircraft accelerates:
- Maintain enough aileron to control the wings
- Use the rudder to stay on the centreline
- Reduce aileron input gradually as control effectiveness increases
- Do not remove all correction automatically
- Monitor changing wind and gusts
The exact amount of control input depends on wind strength, aircraft speed, and aircraft type.
After lift-off, establish the wind correction needed to remain over the extended runway centreline. Once safely airborne, the aircraft may transition from a slight sideslip into a coordinated crab, depending on the aircraft and instructor-approved technique.
Know When the Crosswind Is Too Strong
A crosswind should be evaluated against:
- Aircraft limitations
- Manufacturer guidance
- Maximum demonstrated crosswind information
- Runway condition
- Gust strength
- Pilot experience
- Flight-school limits
- Instructor direction
- Personal minimums
A wind value that an experienced instructor can manage may not be suitable for a beginner pilot.
If centreline control becomes doubtful before takeoff, reduce power and stop while sufficient runway remains. There is no benefit in continuing a departure that already feels uncontrolled.
Recognise an Abnormal Takeoff Roll
Beginner pilots should learn what normal acceleration feels and looks like.
Warning signs during the takeoff roll include:
- Engine power below the expected value
- Abnormal engine indications
- Airspeed not increasing
- Unexpected vibration
- Warning lights or alarms
- Poor acceleration
- Inability to maintain centreline
- Door or window opening
- Unusual noise
- Control problems
- Insufficient runway remaining
When a significant problem appears while adequate runway remains, rejecting the takeoff is usually safer than becoming airborne with an uncertain aircraft.
The exact rejected-takeoff procedure must be discussed with the instructor and based on the aircraft handbook.
Select a Takeoff Decision Point
For operations where runway length or performance may be a concern, pilots should establish an appropriate takeoff decision or abort reference before beginning the roll.
The reference should help answer:
- Is the aircraft accelerating normally?
- Has the expected speed been reached by the selected point?
- Is enough runway available to stop?
- Should the takeoff continue?
The method must be appropriate for the aircraft, runway, performance data, and operating environment. It should not be based on guesswork or a universal rule copied from another aircraft.
Keep the Departure Path Clear
After lift-off, maintain the planned ground track rather than allowing the aircraft to drift with the wind.
Use reference points ahead of the runway to monitor direction. A crosswind may require the aircraft’s nose to be pointed slightly into the wind while the ground track remains aligned with the runway’s extended centreline.
Maintaining this path helps avoid:
- Nearby obstacles
- Parallel runway traffic
- Airport buildings
- Restricted areas
- Unexpected conflict with other aircraft
Continue scanning outside rather than concentrating only on the instruments.
Avoid Rushing Configuration Changes
Do not retract flaps or landing gear simply because the aircraft has just become airborne.
Configuration changes should be completed:
- At the correct altitude
- At the appropriate airspeed
- After confirming a positive climb when required
- According to the aircraft handbook
- Without losing directional or pitch control
Premature flap retraction can reduce lift and cause the aircraft to settle. Sudden configuration changes can also increase workload during the most critical part of the departure.
During a short-field departure, the FAA recommends maintaining the takeoff configuration until obstacles are cleared or until the manufacturer’s procedure directs a change.
Normal, Short-Field and Soft-Field Takeoffs
Normal Takeoff
A normal takeoff is conducted from a suitable runway without unusual surface or obstacle restrictions.
The main priorities are:
- Smooth power application
- Centreline control
- Correct rotation
- Recommended climb speed
- Proper departure tracking
Short-Field Takeoff
A short-field takeoff is used when runway length is restricted or obstacles affect the departure.
It requires precise use of:
- Aircraft performance data
- Approved flap setting
- Full available runway
- Recommended lift-off speed
- Vx for obstacle clearance when specified
- Vy after obstacles are cleared
Short-field techniques vary by aircraft and must be taught by a qualified instructor.
Soft-Field Takeoff
A soft-field takeoff may be used on grass, mud, sand, snow, or rough surfaces.
Its purpose is generally to reduce weight on the wheels, become airborne without excessive surface resistance, and accelerate safely in ground effect before climbing away.
Soft-field technique is different from short-field technique. Attempting to combine the two without proper instruction can produce unsafe airspeed or attitude control.
Common Takeoff Mistakes
Abrupt Power Application
Problem: The aircraft yaws suddenly and becomes difficult to keep straight.
Improvement: Apply power smoothly while using timely rudder correction.
Looking Inside for Too Long
Problem: The aircraft moves away from the centreline or develops an incorrect attitude.
Improvement: Use short instrument checks while keeping most attention outside.
Rotating Too Early
Problem: The aircraft lifts off with insufficient speed and poor climb performance.
Improvement: Use the manufacturer’s recommended rotation speed and attitude.
Rotating Too Aggressively
Problem: Excessive angle of attack, high drag, poor visibility, or an approaching stall.
Improvement: Use smooth back pressure and establish the demonstrated takeoff attitude.
Failing to Use Enough Rudder
Problem: The aircraft yaws during acceleration or climb.
Improvement: Anticipate yaw and maintain coordinated flight.
Overcontrolling the Rudder
Problem: The aircraft swerves from side to side.
Improvement: Use small, prompt corrections instead of large alternating inputs.
Ignoring Crosswind Correction
Problem: The upwind wing rises or the aircraft moves sideways.
Improvement: Apply aileron into the wind and adjust the input as speed increases.
Chasing the Airspeed Indicator
Problem: Pitch attitude becomes unstable.
Improvement: Set the correct visual attitude, cross-check airspeed, and make smooth corrections.
Retracting Flaps Too Early
Problem: The aircraft loses lift or settles toward the runway.
Improvement: Follow the published configuration-change procedure.
Continuing an Abnormal Takeoff
Problem: The pilot becomes airborne with poor acceleration, an engine problem, or insufficient control.
Improvement: Establish clear rejection criteria before the takeoff begins.
Practical Training Tips
Practise Directional Control Separately
With an instructor, practise maintaining the centreline during taxi and low-speed operations before combining the skill with full takeoff acceleration.
Use Consistent Visual References
Select the same types of near and distant references during each takeoff. This builds a repeatable sight picture.
Verbalise Important Checks
During early lessons, call out essential indications such as:
- Power available
- Engine instruments normal
- Airspeed increasing
- Centreline maintained
- Rotation speed reached
- Positive climb established
Use only callouts approved by the instructor or training organisation.
Practise Rejected Takeoffs
Students should understand how to stop safely when a problem is recognised early. Training should be performed under instructor supervision and in suitable conditions.
Compare Different Loading Conditions
Before the first solo flight, discuss how reduced aircraft weight may change acceleration, lift-off point, climb performance, control sensitivity, and pitch attitude.
The FAA notes that an aircraft may become airborne earlier and climb more rapidly when the instructor is no longer aboard.
Debrief Every Departure
After the flight, review:
- Was performance planning accurate?
- Was the briefing complete?
- Was power applied smoothly?
- Did the aircraft remain on the centreline?
- Were engine indications checked?
- Was rotation smooth?
- Was the climb speed stable?
- Was wind drift corrected?
- Were configuration changes properly timed?
- Would rejecting the takeoff have been necessary at any point?
Example Training Scenario
A beginner pilot lines up for takeoff on a warm afternoon. The aircraft is heavily loaded, and the airport is at a higher elevation than the student’s usual training base.
The student applies power and notices that acceleration feels slower than normal. The aircraft eventually reaches rotation speed and becomes airborne, but it remains close to the runway and climbs poorly.
Pulling back would increase the angle of attack and drag. The safer strategy would have been to recognise the performance problem during planning or early in the takeoff roll and reject the departure while sufficient runway remained.
This scenario shows why takeoff safety depends on performance calculations and predefined decisions—not only on control technique.
Quick Takeoff Practice Checklist
Before Entering the Runway
- Performance calculated
- Weight and balance confirmed
- Weather and wind checked
- Aircraft configuration correct
- Engine checks completed
- Flight controls free and correct
- Takeoff speeds reviewed
- Emergency plan briefed
- Runway and approach clear
- Departure path reviewed
During the Takeoff Roll
- Smooth power application
- Takeoff power confirmed
- Engine indications normal
- Airspeed increasing
- Centreline maintained
- Crosswind correction applied
- Acceleration appears normal
- Outside scan maintained
At Lift-Off
- Rotate at the recommended speed
- Use smooth control pressure
- Control yaw with rudder
- Establish the correct attitude
- Avoid excessive back pressure
During the Initial Climb
- Maintain recommended climb speed
- Track the extended centreline
- Correct for wind drift
- Maintain coordinated flight
- Monitor engine indications
- Scan for traffic
- Change configuration only when appropriate
This checklist is for educational revision only. It does not replace an approved aircraft checklist, operating handbook, training syllabus, or instructor briefing.
Frequently Asked Questions
Why does an aircraft yaw during takeoff?
Engine and propeller effects, crosswind, steering geometry, and uneven control inputs can cause yaw. The pilot uses the rudder as required to maintain the runway centreline.
When should a beginner pilot rotate?
Rotation should begin at the speed specified in the aircraft handbook or approved training procedure. There is no universal rotation speed for every aircraft.
What happens if the pilot rotates too early?
The aircraft may lift off with insufficient speed, remain in ground effect, accelerate poorly, or approach a stall.
Why is smooth power application important?
Smooth application helps the pilot maintain directional control and gives time to confirm normal engine operation.
Should brakes be used to stay on the centreline?
During the takeoff roll, directional control is normally maintained primarily with the rudder in many training aircraft. Unnecessary braking can reduce acceleration and increase takeoff distance.
How should a crosswind takeoff be performed?
The pilot generally applies aileron into the wind, uses rudder to maintain the centreline, adjusts control pressure as speed increases, and applies wind correction after lift-off. Aircraft-specific guidance takes priority.
What is the difference between Vx and Vy?
Vx provides the best altitude gain over horizontal distance, while Vy provides the best altitude gain over time. The correct speeds are aircraft-specific.
When should a takeoff be rejected?
A takeoff should be rejected when a significant problem occurs while the aircraft can still be stopped safely. Examples include abnormal engine indications, poor acceleration, control problems, warnings, or runway conflict.
Why is density altitude important?
High density altitude reduces engine, propeller, wing, and climb performance. It can increase the takeoff distance and reduce obstacle-clearance capability.
Can a student practise special takeoff techniques alone?
Short-field, soft-field, crosswind, and maximum-performance takeoffs should first be learned and practised with a qualified flight instructor in a suitable aircraft and environment.
Conclusion
Good takeoff technique begins with preparation rather than power application. Beginner pilots should focus on performance planning, checklist discipline, smooth acceleration, runway centreline control, correct rotation, coordinated flight, and precise climb-speed management. Clear rejection criteria and a willingness to stop when performance is abnormal are equally important. With structured instructor-led practice, takeoffs become more consistent, controlled, and safe.
Aviation Safety Disclaimer
This article is intended for general aviation education only. It does not replace instruction from a qualified flight instructor, an approved training syllabus, the Aircraft Flight Manual, Pilot’s Operating Handbook, official checklists, flight-school procedures, or applicable aviation regulations.
