
Introduction
Landing is one of the most rewarding skills in pilot training, but it is also one of the most difficult to perform consistently. A student must manage airspeed, descent rate, runway alignment, wind correction, aircraft configuration, visual references, flare timing, and directional control within a short period.
Many student pilots focus entirely on making the touchdown smooth. However, the quality of a landing is usually determined much earlier. A correctly planned circuit and stabilized final approach make the roundout, flare, touchdown, and rollout easier to manage.
A slightly firm landing made in the correct attitude, within the intended touchdown area, and under positive control is generally more desirable than a very smooth touchdown following excessive floating or poor runway alignment.
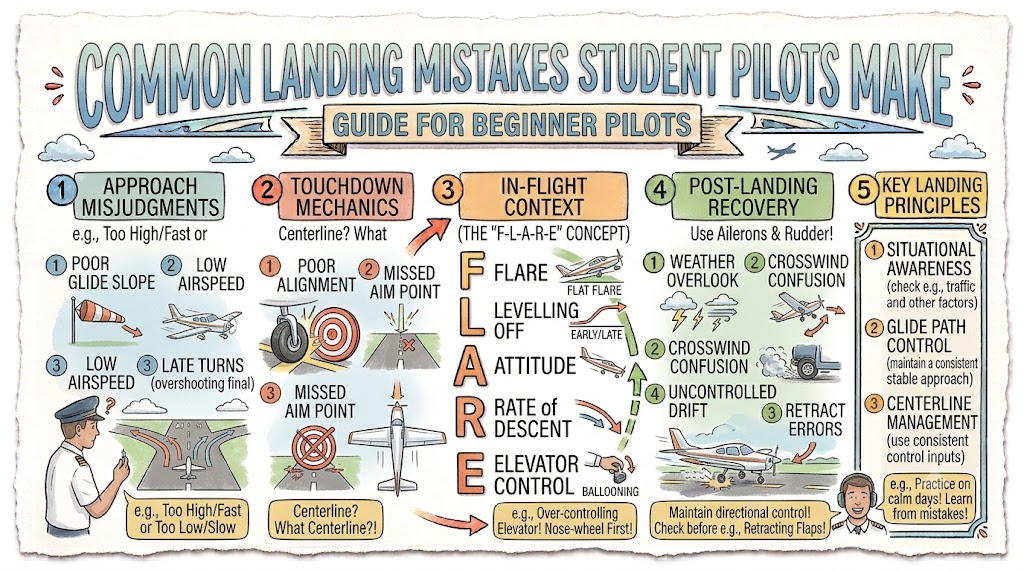
This guide explains the most common landing mistakes student pilots make, why they happen, and how instructor-led practice can help correct them.
Continuing an Unstable Approach
One of the most serious mistakes is continuing an approach that has become unstable.
A stabilized approach normally includes:
- Correct landing configuration
- Recommended approach speed
- Controlled descent rate
- Proper runway alignment
- A consistent glide path
- Only small control corrections
- A suitable touchdown point
- Sufficient runway available
A student may continue an unstable approach because the aircraft is close to the runway, other traffic is waiting, or the pilot feels pressure to complete the landing. This is sometimes called “get-there” thinking.
FAA and EASA guidance both emphasize that a stabilized approach reduces the likelihood of losing control during approach and landing.
How to Correct It
Establish personal, instructor, and flight-school stabilization criteria before entering the circuit. Initiate a go-around when:
- Airspeed remains outside the acceptable range
- The aircraft is too high or too low
- Runway alignment is poor
- Excessive bank or control movement is required
- The landing configuration is incomplete
- The touchdown area cannot be reached safely
- The pilot feels rushed or uncertain
A go-around is not a failed landing. It is a normal safety decision.
Flying the Approach Too Fast
Excessive approach speed is one of the most common student-pilot landing errors.
Students may add unnecessary speed because they fear stalling or believe that extra speed provides greater safety. In reality, excessive speed creates excess energy that must be removed before the aircraft can land.
A fast approach can lead to:
- Excessive floating
- Ballooning during the flare
- Touchdown beyond the intended area
- Increased landing distance
- Difficulty maintaining crosswind control
- Runway overrun risk
- Braking while significant lift remains
A stabilized final approach depends partly on maintaining a consistent final-approach airspeed and configuration.
How to Correct It
Use the approach speed published in the aircraft’s Pilot’s Operating Handbook or approved flight manual.
Make speed corrections early. Do not wait until the aircraft is only a few feet above the runway.
Check:
- Aircraft weight
- Flap configuration
- Wind and gust conditions
- Manufacturer-recommended speed adjustments
- Instructor and school procedures
Do not use an arbitrary speed copied from another aircraft.
Flying the Approach Too Slowly
A slow approach can be equally dangerous.
As airspeed decreases, the aircraft may require a higher angle of attack to maintain the flight path. Control response may become weaker, descent rate may increase, and the aircraft may approach a stall.
Possible consequences include:
- Stall warning activation
- Poor control effectiveness
- High sink rate
- Hard touchdown
- Loss of directional control
- Stall or spin risk during an uncoordinated turn
How to Correct It
Maintain the approved approach speed and monitor trends rather than waiting for a large deviation.
When airspeed becomes too low:
- Reduce excessive angle of attack as necessary.
- Apply appropriate power.
- Re-establish the correct speed and flight path.
- Go around when a stable approach cannot be restored safely.
Avoid pulling back merely to stop the aircraft from descending. Pitch and power must be coordinated.
Poor Airspeed Control
Some students alternate between being too fast and too slow throughout final approach. They make large pitch and power corrections and never allow the aircraft to stabilize.
This often happens because the student:
- Chases the airspeed indicator
- Makes corrections too late
- Uses large control movements
- Does not trim the aircraft
- Fails to anticipate configuration changes
- Looks inside the cockpit for too long
How to Correct It
Use small, smooth corrections and allow time for the aircraft to respond.
A practical method is to:
- Establish the recommended attitude
- Set an appropriate power level
- Trim away unnecessary control pressure
- Cross-check airspeed briefly
- Return attention outside
- Correct trends before they become large
Do not make repeated changes before seeing the effect of the previous input.
Incorrect Circuit or Traffic-Pattern Planning
A poor landing frequently begins with an inconsistent circuit.
Flying too close to the runway can produce a steep, rushed final approach. Flying too far away may create a long, low final or difficulty reaching the runway after power reduction.
Other circuit-planning mistakes include:
- Incorrect circuit altitude
- Poor wind correction
- Late landing checks
- Turning base too early or too late
- Failing to maintain traffic spacing
- Overshooting the final approach
- Rushing configuration changes
How to Correct It
Develop a repeatable traffic-pattern structure with your instructor.
Use suitable visual references for:
- Downwind spacing
- The point for reducing power
- Flap selection
- Base-leg turn
- Final approach alignment
The pattern should be adjusted for wind, traffic, runway length, aircraft performance, and air traffic instructions rather than flown mechanically.
Overshooting the Final Approach
A student who overshoots the runway centreline may try to tighten the turn using excessive bank, inside rudder, or back pressure.
This creates the risk of an uncoordinated stall close to the ground.
How to Correct It
Do not force the aircraft back toward the runway.
Instead:
- Maintain coordinated flight
- Avoid excessive bank
- Reduce the angle of attack if necessary
- Discontinue the unstable approach
- Perform a go-around
A go-around is much safer than attempting to rescue a badly overshot base-to-final turn.
Looking at the Wrong Place
Students often look directly over the nose or at the runway immediately in front of the aircraft during the flare.
Looking too close makes it difficult to judge:
- Height above the runway
- Rate of descent
- Aircraft attitude
- Sideways drift
- Runway alignment
- Flare progression
How to Correct It
During final approach, use a suitable aiming point to judge the flight path.
As the aircraft enters the roundout, gradually move your vision farther along the runway. Use peripheral vision to judge height and movement while continuing to monitor alignment.
Do not fixate on one point. Maintain a broad visual picture.
Fixating on the Airspeed Indicator
Airspeed is important, but looking inside continuously can cause the student to lose awareness of the runway, drift, attitude, and traffic.
A student may follow the instrument accurately while the aircraft moves away from the centreline.
How to Correct It
Use short instrument checks rather than prolonged fixation.
The scan should include:
- Runway position
- Aiming point
- Aircraft attitude
- Wind drift
- Airspeed
- Descent rate
- Engine indications
- Other traffic
During the flare, external visual references become especially important.
Poor Runway Centreline Control
Some students consider the landing acceptable as long as the aircraft touches down somewhere on the runway.
However, runway alignment and directional control are essential parts of a safe landing.
Poor centreline control can cause:
- Side loading on the landing gear
- Runway excursion
- Difficulty during crosswinds
- Conflict with runway-edge hazards
- Loss of control during braking
How to Correct It
Use coordinated rudder and aileron inputs throughout the approach, touchdown, and rollout.
The rudder controls the direction in which the aircraft’s nose points. The ailerons help correct drift and maintain the required wing attitude.
If centreline alignment cannot be restored safely before touchdown, go around.
Flaring Too Early
An early flare occurs when the student begins raising the nose while the aircraft is still too high above the runway.
The aircraft may:
- Balloon upward
- Lose airspeed
- Develop a high sink rate
- Touch down hard
- Stall above the runway
- Begin a series of incorrect pitch corrections
An early flare commonly results from looking too close to the aircraft, misjudging height, or reacting suddenly to the ground appearing closer.
How to Correct It
Maintain the approach attitude until reaching the roundout height demonstrated by the instructor.
Begin the roundout smoothly rather than making one rapid elevator movement.
When the flare begins slightly early:
- Maintain a suitable attitude
- Avoid pushing the nose down
- Add power as required
- Go around if the aircraft balloons significantly or control becomes uncertain
Flaring Too Late
A late flare leaves insufficient time to reduce the descent rate before touchdown.
Possible results include:
- Hard landing
- Nose-wheel-first touchdown
- Landing-gear damage
- Bounce or porpoising
- Loss of directional control
How to Correct It
Improve visual scanning and learn the aircraft’s normal sight picture.
During training:
- Compare different runway widths
- Observe instructor demonstrations
- Practise low approaches when approved
- Sit in the same correctly adjusted position
- Move your vision farther down the runway
- Review each flare immediately after landing
Runway width and slope can create visual illusions, so students should not rely on one fixed apparent height.
Using Abrupt Elevator Inputs
A student may pull back sharply during the flare because the runway appears to be approaching quickly.
Abrupt elevator movement can cause the aircraft to balloon, increase angle of attack rapidly, or lose energy while still above the runway.
How to Correct It
Think of the flare as a continuous transition, not a single movement.
As the aircraft slows:
- Gradually increase back pressure
- Maintain the landing attitude
- Keep the aircraft aligned
- Allow it to settle naturally
- Avoid sudden forward or rearward inputs
Smooth control does not mean slow or hesitant control. Corrections should be timely but proportional.
Stopping the Flare Too Soon
A common mistake is beginning the flare correctly and then holding the elevator in one fixed position.
As the aircraft decelerates, additional back pressure may be needed to maintain the landing attitude. Without it, the nose may lower and the aircraft may touch down firmly or on the nose wheel.
How to Correct It
Continue adjusting the elevator throughout the flare.
The pilot should feel that the aircraft is being prevented from landing too early while it gradually loses speed and settles onto the main wheels.
Do not pull continuously without reference to aircraft attitude. Use the outside picture to regulate the input.
Trying to Make the Aircraft Land
An aircraft carrying excessive speed may float above the runway. Students sometimes respond by pushing the nose down to force the wheels onto the surface.
This can cause:
- Nose-wheel-first touchdown
- Porpoising
- High-speed landing
- Excessive landing distance
- Loss of directional control
How to Correct It
Do not force the aircraft onto the runway.
Maintain the correct attitude and allow excess speed to reduce. Go around when:
- Too much runway has been used
- The normal touchdown area has been missed
- The float continues excessively
- Directional control is uncertain
- The landing cannot be completed safely
A stabilized approach is also an important protection against runway overruns.
Incorrect Crosswind Correction
Crosswind control must continue from final approach through the landing roll.
Common student errors include:
- Removing aileron correction too early
- Failing to align the nose before touchdown
- Using rudder without controlling drift
- Allowing the upwind wing to rise
- Touching down while moving sideways
- Relaxing the controls after touchdown
How to Correct It
Use the crosswind method approved for the aircraft and taught by the instructor.
This may involve:
- Crabbing on final
- Transitioning to a wing-low sideslip
- Using aileron to control drift
- Using rudder to maintain alignment
- Touching down on the upwind main wheel first when appropriate
- Increasing aileron into the wind during rollout
Crosswind limits should account for pilot experience, runway condition, gusts, flight-school policy, and aircraft guidance.
Incorrect Rudder Use
Students sometimes attempt to align the aircraft using aileron alone. Others apply excessive rudder and create unwanted yaw or an uncoordinated condition.
How to Correct It
Understand the separate functions of the controls:
- Aileron: controls bank and helps prevent sideways drift.
- Rudder: controls yaw and keeps the aircraft aligned with the runway.
Use both controls together while maintaining coordination appropriate to the landing technique.
Avoid large or abrupt rudder inputs close to the ground.
Ballooning During the Flare
A balloon happens when the aircraft gains height during the flare.
Common causes include:
- Excessive approach speed
- Abrupt back pressure
- Gusts
- Incorrect visual judgment
- Excessive power
How to Correct It
The response depends on the height and severity of the balloon.
For a minor balloon, an instructor may teach the student to maintain the correct attitude and add a small amount of power as necessary.
For a significant balloon:
- Do not push the nose down
- Maintain positive control
- Apply go-around power
- Follow the approved go-around procedure
Trying to save a large balloon can lead to a hard landing or porpoising.
Bouncing After Touchdown
A bounce may occur when the aircraft:
- Touches down with excessive descent rate
- Lands at excessive speed
- Touches down nose-wheel first
- Has an incorrect landing attitude
- Encounters a gust
A small bounce and a major bounce are not the same. The correct response depends on aircraft attitude, remaining runway, bounce height, and manufacturer guidance.
How to Correct It
After a small bounce:
- Maintain a suitable landing attitude
- Keep the aircraft aligned
- Avoid pushing the nose down
- Add power if required by the approved technique
After a large, repeated, or increasing bounce, initiate a go-around.
Do not continue making larger pitch corrections in an attempt to force the aircraft onto the runway.
Allowing Porpoising to Continue
Porpoising is a series of alternating nose-wheel and main-wheel contacts. Each contact may become more severe than the previous one.
It can begin after:
- A nose-wheel-first touchdown
- Incorrect response to a bounce
- Excessive approach speed
- Abrupt forward and backward elevator inputs
How to Correct It
Do not attempt to ride out an increasing porpoise.
Use the aircraft’s approved procedure and initiate a go-around while maintaining control. Continuing may damage the landing gear or propeller and may lead to loss of control.
Applying Brakes Too Early
Heavy braking immediately after touchdown can be ineffective or unsafe while significant lift remains on the wings.
It can also increase the risk of:
- Wheel lockup
- Tyre damage
- Directional-control problems
- Nose-wheel loading
- Skidding on wet or contaminated surfaces
How to Correct It
After touchdown:
- Maintain directional control.
- Keep the aircraft on the centreline.
- Allow the aircraft to settle properly.
- Lower the nose wheel gently where applicable.
- Apply braking smoothly as required.
- Use aerodynamic braking only when approved and appropriate.
Landing-distance planning should be completed before arrival, not after touchdown.
Relaxing After Touchdown
Students often treat touchdown as the end of the landing. They may relax rudder pressure, centre the ailerons, or look down at cockpit controls.
The aircraft remains vulnerable to wind and directional-control problems throughout the rollout.
How to Correct It
Continue flying the aircraft until it is parked.
During rollout:
- Maintain the centreline
- Use rudder for directional control
- Increase aileron into the wind as speed decreases
- Brake smoothly
- Monitor the runway ahead
- Remain aware of other traffic
- Complete after-landing checks only when appropriate
Failing to Go Around
One of the most important landing mistakes is continuing when the safest option is clearly a go-around.
Students may avoid going around because they:
- Feel embarrassed
- Want to complete the exercise
- Believe the situation will improve
- Fear the go-around procedure
- Think they are already too low
- Do not recognise how unstable the landing has become
How to Correct It
Practise go-arounds frequently with an instructor.
Initiate a go-around for:
- Unstable approach
- Excessive speed
- Poor alignment
- Excessive drift
- Unsafe balloon or bounce
- Runway obstruction
- Traffic conflict
- Winds outside acceptable limits
- Loss of visual reference
- Instructor direction
- Any uncertainty about the landing
A go-around transitions the aircraft from the approach into a stabilized climb.
Judging the Landing Only by Smoothness
A very smooth landing is satisfying, but smoothness alone does not define a good landing.
A landing may feel smooth but still be unsafe because it involved:
- Excessive floating
- Poor runway alignment
- Touchdown far beyond the target area
- Sideways movement
- Incorrect airspeed
- Insufficient runway remaining
How to Correct It
Evaluate the complete manoeuvre:
- Was the approach stable?
- Was the airspeed correct?
- Was the aircraft aligned?
- Was drift controlled?
- Did touchdown occur in a suitable area?
- Was the correct attitude maintained?
- Was directional control positive?
- Was a go-around considered when appropriate?
Failing to Debrief Each Landing
Repeated practice without analysis can reinforce the same errors.
A student may complete ten circuits while making the same speed, flare, or alignment mistake every time.
How to Correct It
After each landing, identify:
- One thing performed correctly
- One primary error
- The likely cause
- One correction for the next circuit
Avoid attempting to correct several problems simultaneously. Work on the most important safety-related issue first.
Practical Landing Improvement Plan
Begin With Stable Approaches
Practise approaches followed by planned go-arounds. Concentrate on:
- Airspeed
- Glide path
- Configuration
- Runway alignment
- Wind correction
Practise Visual References
Ask the instructor to demonstrate:
- Correct aiming point movement
- Proper flare sight picture
- High and low approach indications
- Centreline drift
- Correct landing attitude
Practise Go-Arounds
Go-around practice reduces hesitation and helps students view the manoeuvre as a normal option.
Change One Skill at a Time
During each circuit, select one focus area:
- Airspeed
- Centreline control
- Flare timing
- Crosswind correction
- Touchdown attitude
- Rollout control
Review Recorded Data When Available
Some training aircraft or flight schools may use flight-tracking information or instructor notes. Review these tools only as supplements to instructor judgment.
Example Training Scenario
A student turns onto final slightly high and fast. Instead of going around, the student reduces power and lowers the nose aggressively.
The aircraft crosses the runway threshold above the recommended speed. During the flare, it floats beyond the normal touchdown area. The student becomes concerned about the remaining runway and pushes the nose down.
The aircraft touches down on the nose wheel and bounces. The student then pulls back sharply, creating a second, larger bounce.
The safer decision would have been to recognise the unstable approach early and go around. Even after the first balloon or bounce, a properly executed go-around would have been safer than continuing to force the landing.
The lesson is that landing mistakes often form a chain. Breaking that chain early prevents the final error from becoming serious.
Quick Landing Error-Prevention Checklist
Before Final Approach
- Landing checks complete
- Correct runway confirmed
- Wind understood
- Approach speed reviewed
- Aircraft properly configured
- Go-around criteria established
On Final Approach
- Airspeed stable
- Glide path controlled
- Runway alignment correct
- Descent rate acceptable
- Wind correction maintained
- Touchdown point achievable
- Only small corrections required
During the Flare
- Vision moved farther down the runway
- Smooth roundout initiated
- Alignment maintained
- Drift controlled
- Elevator adjusted progressively
- Aircraft not forced onto the runway
After Touchdown
- Centreline maintained
- Rudder control continued
- Aileron positioned for wind
- Nose wheel lowered gently
- Brakes applied smoothly
- Attention remains outside
- Aircraft controlled until clear
This checklist is for educational revision only. It does not replace the aircraft’s approved checklist, flight manual, instructor guidance, or flight-school procedures.
Frequently Asked Questions
What is the most common student-pilot landing mistake?
Poor airspeed control and continuing an unstable approach are among the most common problems. Many flare and touchdown errors begin because the approach was not stabilized.
Why do student pilots flare too early?
Common causes include looking too close to the aircraft, fear of the ground, incorrect seating position, and misunderstanding the runway sight picture.
Why does an aircraft float during landing?
Floating usually results from excessive approach speed, excess power, an early flare, or a combination of these factors.
What causes a hard landing?
A hard landing may result from a late flare, excessive descent rate, slow airspeed, incorrect attitude, or stopping the flare too early.
Should a pilot push the nose down after ballooning?
No. Pushing the nose down can create a hard or nose-wheel-first touchdown. Maintain control and go around when the balloon is significant.
What should a student do after a bounce?
The response depends on the severity of the bounce and the aircraft’s procedure. A large, repeated, or increasing bounce normally requires a go-around.
Why is runway centreline control important?
Centreline control reduces side loading, protects against runway excursions, and helps the pilot manage crosswinds and braking safely.
Is a firm landing always bad?
No. A controlled, slightly firm touchdown in the correct attitude and touchdown area may be safer than a smooth landing following excessive floating.
When should a student pilot go around?
Go around whenever the approach is unstable, alignment is poor, the touchdown cannot be completed safely, an obstruction exists, or the pilot is uncertain.
How can student pilots improve landings faster?
Practise stabilized approaches, focus on one skill at a time, use correct visual references, review each landing with an instructor, and practise go-arounds regularly.
Conclusion
Most landing mistakes begin before the aircraft reaches the flare. Poor circuit planning, incorrect airspeed, unstable approaches, weak runway alignment, and delayed go-around decisions often lead to hard touchdowns, balloons, bounces, and excessive floating. Student pilots can improve by building consistent approaches, using correct visual references, making smooth control inputs, and treating the go-around as a normal safety manoeuvre.
Aviation Safety Disclaimer
This article is intended for general aviation education only. It does not replace instruction from a qualified flight instructor, an approved training syllabus, the Aircraft Flight Manual, Pilot’s Operating Handbook, official checklists, flight-school procedures, or applicable aviation regulations.
