
Introduction
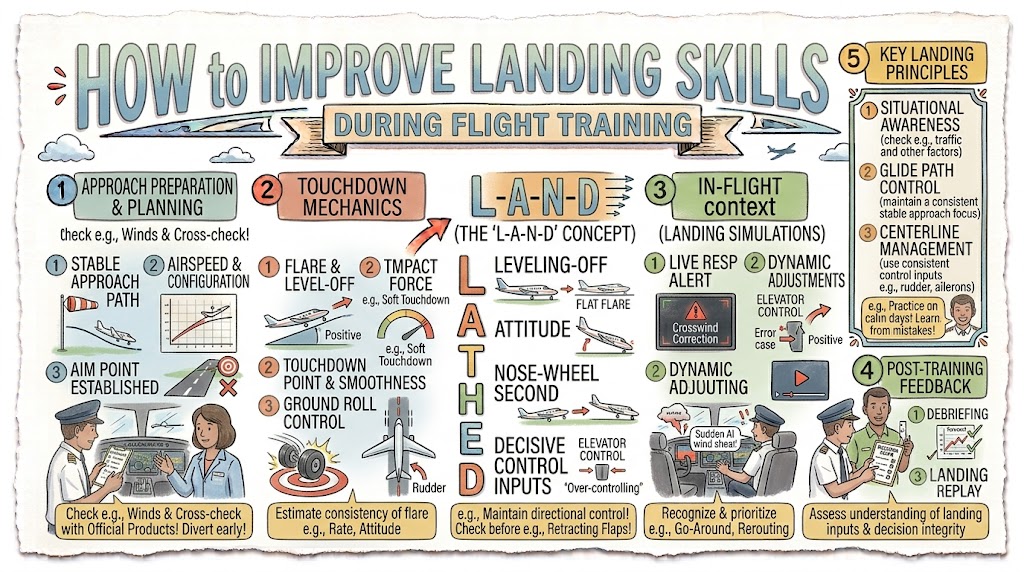
Landing is often the skill that requires the most patience during beginner flight training. A student may fly an accurate circuit, maintain the correct airspeed, and align perfectly with the runway, yet still struggle with the final few seconds before touchdown.
Some landings feel smooth, while others involve floating, ballooning, bouncing, or touching down firmly. This inconsistency is normal during the learning process because landing combines several skills at the same time.
A safe landing depends on:
- Accurate traffic-pattern planning
- Proper aircraft configuration
- Stable approach speed
- Correct glide-path control
- Runway alignment
- Wind correction
- Visual judgment
- Flare timing
- Directional control
- Good go-around decisions
The FAA describes a stabilized approach as one in which the pilot maintains a constant-angle glide path toward a predetermined point while controlling final-approach airspeed and configuration. Building this stable foundation makes the flare and touchdown much easier to manage.
Improving landing skills is not about forcing every touchdown to feel exceptionally smooth. The goal is to complete every approach and landing safely, accurately, and under positive control.
Understand That Landing Begins in the Circuit
Many students think the landing begins when the aircraft crosses the runway threshold. In reality, the quality of the landing is often determined during the downwind and base legs.
A poorly planned circuit can leave the aircraft:
- Too high
- Too low
- Too fast
- Too slow
- Too close to the runway
- Too far from the runway
- Poorly aligned with final approach
- Rushed during configuration changes
Develop a repeatable circuit with your instructor. Use consistent visual references for downwind spacing, power reduction, flap selection, the base turn, and final alignment.
The circuit should not be flown mechanically. Wind, traffic, runway length, aircraft performance, and air traffic instructions may require adjustments.
The objective is to arrive on final approach with enough time and distance to stabilize the aircraft.
Build Every Landing Around a Stabilized Approach
A stabilized approach is one of the most important foundations of consistent landing performance.
The aircraft should normally be:
- In the correct landing configuration
- Maintaining the recommended approach speed
- Following a controlled descent path
- Aligned with the runway
- Correcting for wind drift
- Requiring only small control changes
- Capable of touching down in the planned area
Excessive speed, altitude, descent rate, or manoeuvring can create an unstable approach. Continuing such an approach increases workload at the exact time when the pilot has little altitude and limited time available.
Establish clear stabilization criteria with your instructor or flight school. When those criteria are not met, initiate a go-around instead of attempting to rescue the landing.
Improve Approach-Speed Control
Airspeed has a major effect on every stage of the landing.
When the Approach Is Too Fast
Excessive speed can cause:
- Long floating
- Ballooning during the flare
- Touchdown beyond the target area
- Increased landing distance
- Reduced crosswind control
- Runway-overrun risk
A student may intentionally add extra speed because it feels safer. However, unnecessary speed creates additional energy that must be removed before touchdown.
When the Approach Is Too Slow
Insufficient speed can cause:
- Weak control response
- Increased angle of attack
- Higher sink rate
- Stall-warning activation
- Hard touchdown
- Loss of control close to the ground
Use the approach speed published in the aircraft’s Pilot’s Operating Handbook or approved flight manual. Apply wind or gust corrections only according to manufacturer guidance, instructor direction, or approved school procedures.
Do not use the same approach speed for every aircraft or every condition.
Stop Chasing the Airspeed Indicator
Students sometimes make continuous pitch changes because the airspeed needle moves slightly above or below the target value.
This produces an unstable approach and makes it difficult to maintain the glide path.
Instead:
- Establish the correct visual attitude.
- Set an appropriate power level.
- Trim the aircraft.
- Cross-check the airspeed.
- Make a small correction.
- Allow the aircraft time to respond.
- Recheck the result.
Airspeed control is about identifying and correcting trends. Do not wait for a large deviation, but do not make several corrections before seeing the effect of the first one.
Most of the pilot’s attention should remain outside, supported by brief instrument checks.
Coordinate Pitch and Power
Pitch and power work together during the approach.
A useful training principle in many light aircraft is:
- Pitch primarily helps control airspeed.
- Power primarily helps control the descent path.
This is not an absolute rule. Any pitch or power change can affect both speed and flight path, so the controls must be coordinated.
For example, when the aircraft is below the desired glide path but the airspeed is correct, a small power increase may reduce the descent rate. When the aircraft is too fast and high, the pilot may need a coordinated reduction in power and an appropriate attitude adjustment.
Large, repeated corrections usually indicate that the approach has become unstable.
Use Trim Correctly
An out-of-trim aircraft requires continuous control pressure. This increases workload and can lead to overcontrolling.
After establishing the desired attitude, power setting, configuration, and speed, trim away unnecessary control pressure.
Correct trimming helps the student:
- Maintain a consistent speed
- Make smaller control inputs
- Improve visual scanning
- Reduce fatigue
- Feel changes in aircraft performance
- Concentrate on runway alignment
Trim should reduce pressure rather than fly the aircraft by itself. Continue controlling the aircraft actively throughout the approach.
Select and Monitor an Aiming Point
Choose a suitable aiming point on the runway during final approach.
When the aircraft is travelling toward that point, it should appear relatively stationary in the windscreen. If the point moves upward, the aircraft may be undershooting. If it moves downward, the aircraft may be overshooting.
The aiming point is not necessarily the touchdown point. During the roundout and flare, the aircraft continues travelling forward before the wheels contact the runway.
Practising aim-point control helps students understand:
- Glide-path stability
- Power corrections
- Approach geometry
- Touchdown-zone planning
- Whether a landing remains achievable
Avoid changing aiming points repeatedly during final approach unless conditions require it.
Improve the Outside Visual Scan
Landing depends heavily on visual judgment.
During final approach, divide attention between:
- The aiming point
- Runway edges
- Centreline
- Aircraft attitude
- Wind drift
- Other traffic
- Short instrument checks
As the aircraft enters the roundout, gradually move your vision farther down the runway.
Looking too close to the nose makes it difficult to judge:
- Height above the surface
- Descent rate
- Landing attitude
- Sideways drift
- Runway alignment
Looking farther ahead creates a broader visual picture and allows peripheral vision to judge height and movement more accurately.
Maintain a Consistent Seating Position
Changing the seat position changes the pilot’s view over the nose and can affect flare judgment.
Before starting the engine:
- Adjust the seat correctly.
- Confirm full rudder-pedal movement.
- Check that the flight controls can be operated comfortably.
- Lock the seat securely.
- Use the same practical position during each lesson.
A consistent eye position makes it easier to recognise the normal approach and landing attitudes.
Students flying different aircraft should expect each type to have a different sight picture.
Learn the Correct Roundout and Flare Picture
The roundout is the transition from the approach descent toward a nearly level flight path close to the runway.
The flare continues that transition by gradually increasing the aircraft’s pitch attitude as speed decreases.
A basic landing sequence is:
- Maintain a stabilized final approach.
- Cross the threshold at the correct speed and height.
- Move your vision farther along the runway.
- Begin the roundout smoothly.
- Reduce power according to the approved technique.
- Gradually increase back pressure.
- Maintain runway alignment.
- Control sideways drift.
- Allow the aircraft to settle onto the runway.
The flare should not be one sudden elevator movement. It is a progressive adjustment that continues as the aircraft loses speed.
Avoid Flaring Too Early
An early flare occurs when the student raises the nose while the aircraft is still too high.
Possible results include:
- Ballooning
- Rapid airspeed loss
- High sink rate
- Hard touchdown
- Stall above the runway
- Incorrect pitch corrections
Early flares often happen because the student looks too close to the aircraft or reacts suddenly when the runway appears to expand in the windscreen.
When the flare begins slightly early, maintain control and avoid pushing the nose down. A small amount of power may be required under instructor-approved procedures.
A significant balloon or uncertain landing should lead to a go-around.
Avoid Flaring Too Late
A late flare leaves insufficient time to reduce the descent rate.
It may produce:
- Hard touchdown
- Nose-wheel-first contact
- Bounce
- Porpoising
- Landing-gear stress
Late flares frequently result from looking directly over the nose, fixating on the aiming point, or failing to recognise how quickly the ground is approaching.
To improve flare timing:
- Watch instructor demonstrations carefully.
- Maintain the same seating position.
- Move your eyes farther down the runway.
- Practise stable approaches before focusing on touchdown.
- Compare each flare with the previous one.
- Ask the instructor to explain the exact visual cue being used.
Continue Increasing Back Pressure Gradually
Some students begin the flare correctly but then stop moving the elevator.
As the aircraft slows, more elevator input may be required to maintain the landing attitude. If the pilot holds the control in one fixed position, the nose may lower and the aircraft may touch down firmly.
Continue making small adjustments as the aircraft decelerates.
Think of the process as preventing the aircraft from landing too early while allowing it to settle naturally.
Do not pull back mechanically. Every control movement should be based on the outside sight picture and the aircraft’s response.
Do Not Force the Aircraft Onto the Runway
When the aircraft floats, a student may push the nose down because the planned touchdown point is passing underneath.
This can produce:
- Nose-wheel-first touchdown
- Porpoising
- High-speed runway contact
- Loss of directional control
- Excessive landing distance
Floating is usually a symptom of excessive speed, incorrect power management, an early flare, or a combination of these factors.
Maintain the correct landing attitude and allow the speed to reduce. Go around when too much runway has been used or the landing can no longer be completed safely.
Focus on Runway Centreline Control
A smooth touchdown away from the centreline is not a well-controlled landing.
Maintain centreline discipline throughout:
- Final approach
- Roundout
- Flare
- Touchdown
- Landing roll
- Runway exit
Use the rudder to control nose alignment and the ailerons to control bank and wind drift.
If the aircraft cannot be aligned safely before touchdown, initiate a go-around.
Centreline control should remain a priority even while correcting speed, height, or flare timing.
Improve Crosswind Landing Skills Gradually
Crosswind landings require the pilot to manage both drift and alignment.
Depending on the aircraft and instructor-approved method, the pilot may use:
- A crab during final approach
- A wing-low sideslip
- A crab followed by a transition to a sideslip
- A combination suited to changing wind conditions
At touchdown:
- Sideways drift should be controlled.
- The aircraft should be aligned with the runway.
- The upwind wing should remain controlled.
- Rudder and aileron inputs should be coordinated appropriately.
Continue applying wind correction after touchdown. As the aircraft slows, aerodynamic control effectiveness decreases, so additional aileron input into the wind may be necessary.
Begin practising in light crosswinds. Increase the difficulty only as skill, confidence, and instructor judgment permit.
Practise Go-Arounds as Part of Landing Training
Students sometimes delay a go-around because they believe it represents failure.
A go-around is a normal safety manoeuvre. It should be used whenever a safe landing is no longer assured.
Go around when:
- The approach is unstable.
- Airspeed cannot be controlled.
- The aircraft is poorly aligned.
- Excessive drift exists.
- The runway is obstructed.
- The aircraft balloons significantly.
- A bounce becomes large or repeated.
- The touchdown area has been missed.
- Wind conditions exceed acceptable limits.
- The pilot becomes uncertain.
FAA and EASA safety guidance both emphasise the importance of abandoning an unstable approach rather than continuing toward a landing with decreasing safety margins.
Practise go-arounds from different stages of the approach so the power, attitude, configuration, coordination, and climb sequence becomes familiar.
Understand Ballooning, Bouncing and Porpoising
Ballooning
A balloon occurs when the aircraft gains height during the flare, usually because of excessive speed or abrupt back pressure.
A minor balloon may be manageable using the instructor-approved technique. A significant balloon should normally lead to a go-around.
Bouncing
A bounce occurs when the aircraft returns to the air after touchdown.
A small bounce may be recoverable if the aircraft remains aligned, sufficient runway remains, and the pilot maintains control. A large or increasing bounce usually requires a go-around.
Porpoising
Porpoising is a series of alternating nose-wheel and main-wheel contacts. It may become progressively more severe.
It commonly develops after:
- Nose-wheel-first touchdown
- Excessive speed
- Incorrect response to a bounce
- Rapid forward and backward elevator inputs
Do not try to force a porpoising aircraft onto the runway. Follow the aircraft’s approved procedure and initiate a go-around when control is uncertain.
Continue Flying After Touchdown
Touchdown is not the end of the landing.
During the rollout:
- Maintain the runway centreline.
- Continue rudder control.
- Apply appropriate aileron into the wind.
- Lower the nose wheel gently where applicable.
- Use braking according to runway conditions.
- Keep looking ahead.
- Remain alert for traffic and runway exits.
Students often relax immediately after the main wheels touch. This can allow the aircraft to weathervane, drift, or move away from the centreline.
Continue controlling the aircraft until it is parked and secured.
Practise One Landing Skill at a Time
Trying to improve every part of the landing during one circuit can overload a student.
Divide landing practice into smaller objectives.
Session One: Stabilized Approaches
Focus on:
- Pattern planning
- Configuration
- Airspeed
- Glide path
- Alignment
Complete planned go-arounds without attempting every approach as a landing.
Session Two: Visual References
Focus on:
- Aiming-point movement
- Runway expansion
- Flare sight picture
- Looking farther ahead
- Centreline position
Session Three: Flare Timing
Focus on:
- Roundout height
- Smooth elevator movement
- Landing attitude
- Progressive back pressure
Session Four: Directional Control
Focus on:
- Centreline alignment
- Rudder use
- Aileron input
- Rollout control
Session Five: Crosswind Technique
Begin with light crosswinds and practise controlling drift and alignment separately before combining them.
Session Six: Go-Around Decisions
Ask the instructor to create realistic situations requiring a go-around.
This focused approach helps students understand which input produced each result.
Use Chair Flying Between Lessons
Chair flying means mentally rehearsing a flight procedure while sitting on the ground.
Visualise:
- Entering the circuit
- Completing landing checks
- Selecting flap settings
- Turning onto final
- Establishing approach speed
- Monitoring the aiming point
- Beginning the flare
- Maintaining alignment
- Touching down
- Controlling the rollout
- Initiating a go-around
Say important actions and callouts aloud when appropriate.
Mental rehearsal does not replace flight time, but it can reduce hesitation and help students arrive at the next lesson better prepared.
Use Simulator Training Carefully
A simulator can help with:
- Circuit sequencing
- Checklist flow
- Airspeed control
- Glide-path corrections
- Crosswind concepts
- Go-around practice
- Decision-making
However, basic simulators may not reproduce flare height, control feel, ground effect, peripheral vision, or touchdown sensations accurately.
Use simulator sessions to practise procedures and coordination rather than treating every simulated touchdown as an exact copy of the real aircraft.
Keep a Landing Training Log
After each flight, record:
- Weather and wind
- Runway used
- Aircraft configuration
- Approach-speed consistency
- Common flare error
- Centreline performance
- Crosswind difficulty
- Go-around decisions
- Instructor feedback
- One goal for the next lesson
A training log helps identify patterns.
For example, you may discover that most hard landings begin with a slow final approach, or that most long floats happen after carrying excess speed across the threshold.
Tracking the cause is more useful than recording only whether the landing felt smooth.
Use a Simple Post-Landing Debrief
After each circuit, ask:
- Was the circuit well planned?
- Was the approach stabilized?
- Was the speed correct?
- Was the aiming point stable?
- Did I maintain the centreline?
- Where was I looking during the flare?
- Did I begin the roundout too early or too late?
- Did I continue adjusting the elevator?
- Was crosswind correction maintained?
- Should I have gone around?
Select one main improvement for the next circuit.
Trying to correct five mistakes at once may create more confusion. Address the most important safety issue first.
Listen to Instructor Feedback Precisely
General feedback such as “flare better” is difficult to apply. Ask for specific guidance.
Useful questions include:
- Was my approach too fast or too slow?
- Did I begin the roundout too high?
- Where should I have been looking?
- Did I stop increasing back pressure?
- Was I aligned with the runway?
- Did I remove the crosswind correction?
- At what point should I have gone around?
- Which single correction should I focus on next?
Students improve faster when they understand the cause-and-effect relationship between their actions and the aircraft’s response.
Avoid Comparing Your Progress With Other Students
Landing progress is rarely identical between students.
One student may understand flare timing quickly but struggle with rudder coordination. Another may maintain excellent centreline control but carry too much speed.
Measure progress by asking:
- Are approaches becoming more stable?
- Are corrections becoming smaller?
- Is centreline control improving?
- Are go-around decisions becoming earlier?
- Can mistakes be recognised independently?
- Is each landing completed under positive control?
Consistency develops gradually through quality practice, not pressure.
A Practical Landing Improvement Plan
Before the Lesson
- Review the aircraft handbook.
- Memorise the approved approach speeds.
- Study the weather and wind.
- Review the circuit procedure.
- Rehearse the go-around.
- Select one main training objective.
During the Lesson
- Fly a consistent circuit.
- Configure the aircraft early.
- Trim properly.
- Maintain the recommended speed.
- Use a stable aiming point.
- Keep most attention outside.
- Move your vision down the runway during the flare.
- Maintain centreline control.
- Go around when required.
After the Lesson
- Review each landing with the instructor.
- Write down recurring errors.
- Identify their likely causes.
- Chair-fly the corrected procedure.
- Carry one specific goal into the next lesson.
Example Training Scenario
A student pilot consistently floats during landing.
At first, the student concentrates on reducing the float by pushing the nose down after crossing the threshold. This produces flat and occasionally nose-wheel-first touchdowns.
During the debrief, the instructor identifies the real problem: the student is flying final approach several knots above the recommended speed.
During the next circuits, the student focuses only on:
- Configuring earlier
- Maintaining the published speed
- Trimming correctly
- Avoiding unnecessary power changes
- Holding a stable aiming point
With less excess energy, the aircraft requires less runway to decelerate. The flare becomes easier, and the touchdown occurs closer to the planned area.
The improvement came from correcting the approach rather than forcing the final stage of the landing.
Quick Landing Improvement Checklist
In the Circuit
- Correct altitude
- Consistent runway spacing
- Wind correction applied
- Landing checks completed
- Configuration selected on time
- Traffic monitored
On Final Approach
- Correct airspeed
- Stable glide path
- Runway alignment
- Controlled descent rate
- Wind correction maintained
- Touchdown area achievable
- Only small corrections required
During the Flare
- Vision moved farther down the runway
- Roundout started smoothly
- Back pressure increased progressively
- Runway alignment maintained
- Sideways drift controlled
- Aircraft not forced down
After Touchdown
- Centreline maintained
- Rudder control continued
- Aileron adjusted for wind
- Nose wheel lowered gently
- Braking applied appropriately
- Aircraft controlled until clear
This checklist is for educational revision only. It does not replace the aircraft’s approved checklist, flight manual, training syllabus, or instructor guidance.
Frequently Asked Questions
How long does it take to improve landing skills?
The time varies between students, aircraft, weather conditions, lesson frequency, and training quality. Consistent practice and focused debriefing are more important than comparing a particular number of landings.
Why are my landings inconsistent?
Inconsistent landings commonly result from changes in circuit spacing, airspeed, glide path, visual focus, flare timing, or wind correction.
What is the best way to improve flare timing?
Fly stable approaches, maintain a consistent seating position, move your vision farther down the runway, and compare each attempt with instructor demonstrations.
Why does the aircraft float during landing?
Floating usually results from excessive approach speed, excess power, an early flare, or a combination of these factors.
Why do I flare too early?
Looking too close to the aircraft, fear of the ground, incorrect seating position, and an unstable approach can all contribute to an early flare.
Is a firm landing always a bad landing?
No. A controlled, slightly firm touchdown in the correct attitude and touchdown area may be safer than a smooth landing following excessive floating or poor alignment.
How can I improve runway centreline control?
Look farther ahead, use the rudder to control alignment, use aileron to control drift, and continue making corrections throughout touchdown and rollout.
Should I practise landings in strong crosswinds?
Crosswind difficulty should increase gradually under instructor supervision. Wind must remain within aircraft, school, instructor, and student-pilot limits.
When should I go around?
Go around whenever the approach is unstable, alignment is poor, excessive drift exists, the touchdown area cannot be reached safely, or you are uncertain about completing the landing.
Can simulator practice improve real landings?
A simulator can improve procedures, circuit planning, scanning, and go-around decisions. However, it may not accurately reproduce flare height, ground effect, control feel, or touchdown sensations.
Conclusion
Landing skills improve when student pilots focus on the complete manoeuvre rather than only the touchdown. Consistent circuits, stabilized approaches, accurate airspeed, correct visual references, progressive flare inputs, runway alignment, and confident go-around decisions create safer and more repeatable landings. Practise one skill at a time, review every attempt honestly, and use instructor feedback to correct the cause of each error.
Aviation Safety Disclaimer
This article is intended for general aviation education only. It does not replace instruction from a qualified flight instructor, an approved training syllabus, the Aircraft Flight Manual, Pilot’s Operating Handbook, official checklists, flight-school procedures, or applicable aviation regulations.
