
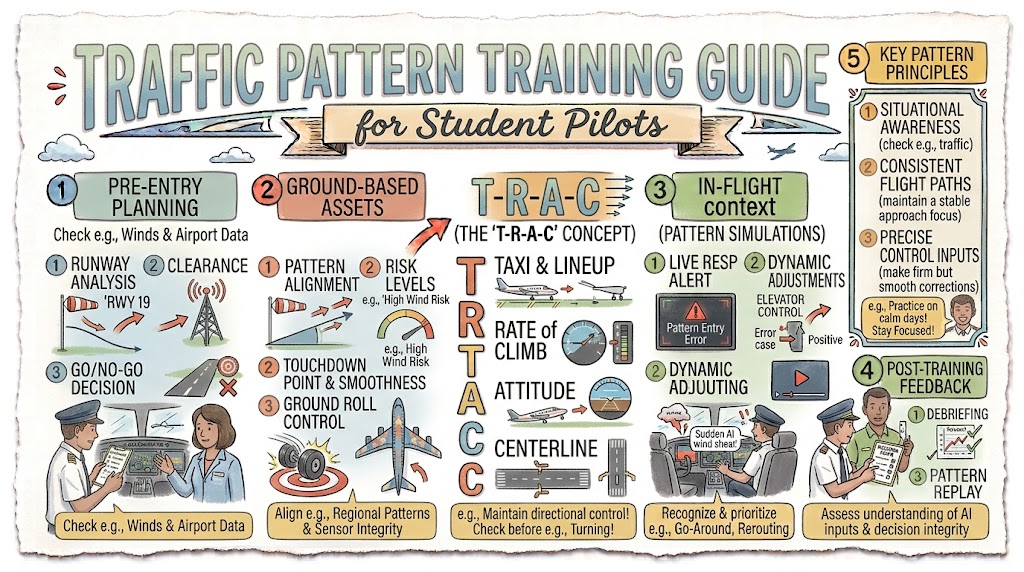
Introduction
Traffic-pattern training is one of the most important parts of learning to fly. It combines takeoff technique, aircraft control, lookout, radio communication, checklist use, wind correction, approach planning, landing, and go-around decisions within a relatively small area.
The manoeuvre may look simple from the ground, but a student pilot must manage several tasks at once. The aircraft must remain at the correct altitude and spacing while the pilot watches for traffic, listens to radio calls, completes checks, adjusts configuration, controls airspeed, and prepares for landing.
An airport traffic pattern creates an organised flow for aircraft arriving, departing, and landing. Its direction, altitude, entry procedure, and shape can vary because of local terrain, obstacles, runway layout, noise restrictions, weather, and airport procedures.
In many countries, the term traffic circuit is used instead of traffic pattern. The basic purpose remains the same: to create a predictable and safer flow of aircraft around the airport.
What Is an Airport Traffic Pattern?
An airport traffic pattern is a planned flight path followed by aircraft operating near a runway. It normally has a rectangular shape and allows pilots to organise takeoffs, approaches, landings, and departures.
The standard pattern consists of several named legs:
- Departure or upwind leg
- Crosswind leg
- Downwind leg
- Base leg
- Final approach
The pattern may be flown with left turns or right turns. Left-hand patterns are commonly treated as standard unless airport information, visual indicators, air traffic control, or local rules specify otherwise. Pilots must confirm the correct direction before entering or flying the pattern.
Why Traffic-Pattern Training Matters
Traffic-pattern practice teaches students how to manage the aircraft during the busiest phases of a flight.
It develops:
- Aircraft control at lower airspeeds
- Takeoff and landing consistency
- Situational awareness
- Radio discipline
- Runway identification
- Wind correction
- Traffic separation awareness
- Checklist management
- Approach planning
- Go-around judgment
Following an established pattern also reduces unnecessary low-altitude manoeuvring and makes an aircraft’s path easier for other pilots to anticipate. However, flying the published pattern does not remove the pilot’s responsibility to maintain an effective lookout and avoid other aircraft.
Understand the Five Traffic-Pattern Legs
Departure or Upwind Leg
The departure leg begins after takeoff and normally follows the runway heading or its extended centreline.
During this leg, the student should:
- Maintain directional control
- Establish the recommended climb attitude
- Hold the appropriate climb speed
- Correct for wind drift
- Monitor engine indications
- Watch for traffic
- Follow air traffic control instructions where applicable
If remaining in the pattern, the pilot normally continues climbing before turning onto the crosswind leg. The turning point should follow local procedures and instructor guidance rather than an arbitrary visual cue.
The word upwind is sometimes used for the departure leg. In some training systems, however, upwind may describe a separate leg flown parallel to the runway in the landing direction. Students should use the terminology taught by their instructor and aviation authority.
Crosswind Leg
The crosswind leg is flown approximately perpendicular to the runway after the departure turn.
The student should continue climbing toward the published or assigned pattern altitude while correcting for wind. A strong wind may require the aircraft’s heading to differ noticeably from its ground track.
The pilot must also look carefully for:
- Aircraft joining downwind
- Aircraft flying wider patterns
- Helicopters or gliders
- Traffic entering from another direction
- Aircraft conducting straight-in approaches
Avoid turning mechanically after a fixed number of seconds. Traffic, altitude, wind, runway layout, and local instructions should influence the turn.
Downwind Leg
The downwind leg is flown parallel to the landing runway in the direction opposite to landing.
This leg gives the student time to:
- Stabilise at pattern altitude
- Maintain runway spacing
- Complete landing checks
- Select configuration when required
- Monitor other traffic
- Review wind conditions
- Plan the base turn
- Prepare for a possible go-around
At a non-towered airport, an arriving aircraft commonly joins the pattern on the downwind leg in accordance with the entry method recommended or required locally. FAA guidance shows entry at pattern altitude and abeam the runway area, but airport-specific procedures always take priority.
Base Leg
The base leg is flown approximately perpendicular to the runway and connects downwind with final approach.
During base, the student normally:
- Continues configuring the aircraft
- Controls airspeed
- Adjusts descent rate
- Maintains coordination
- Corrects for wind
- Checks final approach for traffic
- Evaluates whether the approach is stable
The base-to-final turn requires special attention. Overshooting the runway centreline can tempt a student to use excessive rudder, bank, or back pressure. This may produce an uncoordinated high-angle-of-attack condition close to the ground.
When the turn cannot be completed safely, the correct response is to discontinue the approach and go around.
Final Approach
The final approach leg is aligned with the landing runway.
The student should establish:
- Correct landing configuration
- Recommended approach speed
- Stable descent path
- Runway centreline alignment
- Appropriate crosswind correction
- Suitable touchdown planning
- Readiness to go around
FAA traffic-pattern guidance recommends completing the turn to final with adequate distance remaining rather than making a late, steep turn close to the runway.
A landing should not continue simply because the aircraft has reached final. If the approach is unstable, traffic appears on the runway, spacing is inadequate, or conditions are uncertain, initiate a go-around.
Learn the Pattern Before the Flight
Traffic-pattern preparation should begin during preflight planning.
Review:
- Runway layout
- Published pattern altitude
- Left- or right-hand pattern direction
- Airport diagram
- Radio frequencies
- Tower operating hours
- Local reporting points
- Noise-abatement procedures
- Obstacles and terrain
- Runway closures
- Notices affecting the airport
- Helicopter, glider, parachute, or training activity
FAA guidance advises pilots to review applicable aeronautical publications and current notices for traffic-pattern and airport information before operating.
A student should never assume that every airport uses the same altitude, entry, radio procedure, or pattern direction.
Confirm the Pattern Altitude
The correct pattern altitude may be published in airport information or assigned by air traffic control.
Do not automatically use one memorised altitude at every airport. Pattern altitudes may differ because of:
- Terrain
- Obstacles
- Airspace
- Noise-sensitive areas
- Aircraft category
- Local traffic flow
- Parallel runways
- Special operations
Enter the pattern in level flight at the correct altitude whenever practical. Descending into a busy pattern can make the aircraft harder to see and may create a conflict with traffic already established at pattern altitude. FAA collision-avoidance guidance specifically warns about the hazards of descending entries.
Determine the Runway in Use
The runway selected for takeoff and landing is usually influenced by wind, runway availability, traffic, surface condition, local procedures, and air traffic control instructions.
Before joining a non-towered airport pattern, gather information from suitable sources such as:
- Airport weather broadcasts
- Wind indicators
- Radio calls from other pilots
- Published airport information
- Air traffic services
- Visual traffic-pattern indicators
FAA guidance recommends using wind and pattern indicators and observing existing traffic flow. When aircraft are already operating safely on a runway, arriving pilots should avoid creating unnecessary conflict by attempting to establish a different flow without a valid reason.
Wind information is only one part of the decision. Runway closures, obstacles, traffic, surface conditions, and local operating procedures must also be considered.
Left-Hand and Right-Hand Patterns
In a left-hand pattern, every normal pattern turn is made to the left.
In a right-hand pattern, every normal pattern turn is made to the right.
Right-hand patterns may be established to avoid:
- Terrain
- Buildings
- Noise-sensitive areas
- Restricted airspace
- Conflicting airport operations
- Parallel-runway traffic
Pilots should check charts, airport publications, markings, segmented circles, or local instructions to confirm the correct direction. At FAA-regulated non-towered airports, right traffic may be identified by an “RP” notation followed by the affected runway number.
At a towered airport, follow the pattern entry and turn direction issued by the controller.
Towered Airport Pattern Operations
At an airport with an operating control tower, the controller may instruct the pilot to:
- Enter left or right downwind
- Join base
- Make a straight-in approach
- Extend downwind
- Make a short approach
- Follow another aircraft
- Continue the approach
- Go around
- Change runway
- Report a specific position
The pattern may therefore differ from the standard rectangular route. The pilot must listen carefully, read back required instructions, identify assigned traffic, and ask for clarification when uncertain.
Air traffic control assists with sequencing, but the pilot must still maintain situational awareness and avoid becoming fully dependent on radio instructions. The FAA notes that tower controllers may direct aircraft to enter the pattern at different points to manage traffic efficiently.
Non-Towered Airport Pattern Operations
At a non-towered airport, pilots organise their movements through predictable flying, effective lookout, and appropriate radio communication.
The student should:
- Determine the runway and pattern direction
- Listen before transmitting
- Build a mental picture of traffic
- Enter without disrupting aircraft already established
- Make clear position reports
- Maintain visual separation
- Remain alert for aircraft without radios
- Watch for straight-in or instrument traffic
- Avoid assuming that radio silence means the area is clear
FAA guidance recommends monitoring and communicating on the designated common frequency near a non-towered airport while remaining responsible for seeing and avoiding traffic.
Radio calls improve awareness, but they do not create separation by themselves.
Traffic-Pattern Entry
The safest entry method depends on the country, airport, airspace, traffic, and local regulations.
A common training entry to a non-towered left-hand pattern involves approaching the downwind leg at pattern altitude and joining at approximately a 45-degree angle. The aircraft should enter well clear of other traffic and fit into the existing sequence rather than forcing its way into the pattern.
Before joining:
- Listen to the traffic frequency.
- Identify the runway in use.
- Confirm left- or right-hand traffic.
- Locate aircraft already in the pattern.
- Enter at the proper altitude.
- Match the general flow and spacing.
- Communicate your position and intentions.
- Remain prepared to delay, orbit clear of the pattern, or use another safe option.
Do not descend into the downwind leg from directly above other pattern traffic.
Pattern Spacing
Correct spacing gives the student time to configure the aircraft and make a stable approach.
Flying too close to the runway can create:
- A steep base-to-final turn
- Excessive descent rate
- Rushed checklist use
- Poor runway alignment
- Overshooting final
Flying too far from the runway can create:
- An unnecessarily long pattern
- Difficulty reaching the runway after power reduction
- Conflict with surrounding traffic
- Poor judgment of the glide path
- Reduced emergency options
Use a repeatable visual reference taught by the instructor, while adjusting for wind and aircraft performance.
Do not simply copy the exact spacing of a faster or slower aircraft. Different aircraft may require different pattern sizes, and FAA guidance recognises that aircraft performance can affect pattern dimensions.
Maintain Pattern Altitude Properly
After reaching pattern altitude, establish level flight accurately.
A common student error is continuing to climb while becoming distracted by the runway, radio, or checklist. Another is beginning the descent too early.
To improve altitude control:
- Use the correct visual attitude
- Reduce power smoothly
- Allow airspeed to stabilise
- Trim the aircraft
- Cross-check the altimeter
- Continue scanning outside
On downwind, maintain the published or assigned altitude until the planned descent point unless air traffic control or local procedures require otherwise.
Use Wind Correction on Every Leg
Wind changes the aircraft’s ground track throughout the pattern.
Departure Leg
Correct drift to remain over the extended runway centreline.
Crosswind Leg
Adjust heading to maintain the intended perpendicular ground track.
Downwind Leg
Crab into the wind so the aircraft remains parallel to the runway.
Base Leg
Expect the wind to either increase or reduce groundspeed. A strong tailwind on base can rapidly carry the aircraft through final.
Final Approach
Use the aircraft-approved crosswind technique to control drift and maintain runway alignment.
Students should think in terms of ground track, not merely aircraft heading. The nose may need to point into the wind for the aircraft to follow the desired rectangular pattern.
Manage Airspeed and Configuration
Traffic-pattern training is not a race to complete checks or select flaps.
Configuration changes should be completed:
- At appropriate points
- Within aircraft limitations
- According to the approved checklist
- Without sacrificing lookout or control
- Early enough to support a stable approach
The student should know the recommended speeds for:
- Climb
- Pattern operation
- Flap extension
- Base leg
- Final approach
- Go-around
Exact speeds vary by aircraft, weight, configuration, wind, and operating procedure. Use the aircraft’s approved handbook and instructor guidance.
Avoid carrying excessive speed simply to keep up with faster traffic. If spacing becomes unsafe, communicate, extend, leave the pattern, or follow controller instructions rather than flying outside safe aircraft limits.
Develop Effective Radio Calls
Radio communication should be clear, brief, and useful.
A position report generally includes:
- Airport name
- Aircraft identification
- Current position
- Runway
- Intended action
- Airport name repeated when appropriate
Examples of useful pattern information include reporting entry to downwind, downwind position, base, final, and departure intentions. FAA AC 90-66C provides these positions as examples for communication at non-towered airports.
Avoid:
- Unnecessarily long transmissions
- Non-standard personal conversation
- Stepping on another transmission
- Reporting vague local landmarks unknown to visiting pilots
- Assuming that another pilot has seen you
- Using radio calls as a substitute for lookout
Communication terminology and required calls vary by country. Follow the phraseology taught by your instructor and aviation authority.
Maintain an Effective Lookout
Traffic-pattern flying requires continuous visual scanning.
Look for aircraft:
- Ahead on the same leg
- Joining downwind
- Turning base
- On final approach
- Departing the runway
- Flying a straight-in approach
- Operating on another runway
- Above or below the normal pattern
- Without transmitting on the radio
Check before every turn. Move the wing when necessary and safe to clear an area hidden from view.
Do not focus entirely on the runway or aircraft instruments. FAA guidance emphasises that established traffic procedures do not reduce the pilot’s responsibility to see and avoid other aircraft.
Avoid Blindly Following Other Aircraft
Seeing another aircraft ahead does not guarantee that it is using the correct runway, altitude, or pattern.
Verify independently:
- Runway number
- Pattern direction
- Traffic position
- Wind
- Airport information
- Controller instruction
- Landing clearance where required
Maintain enough spacing to account for differences in speed and aircraft performance.
The aircraft ahead may:
- Make a full-stop landing
- Perform a touch-and-go
- Stop on the runway
- Go around
- Fly a wider pattern
- Be operating on another runway
Always keep an escape plan.
Manage Mixed Aircraft Traffic
Traffic patterns may contain aircraft with significantly different performance.
Students may encounter:
- Helicopters
- Gliders
- Ultralights
- Turboprops
- Jets
- Parachute operations
- Instrument-training aircraft
- Agricultural or emergency aircraft
Some aircraft may fly higher, lower, wider, closer, faster, or slower patterns. FAA guidance notes that airports may have separate procedures for helicopters, gliders, ultralights, and parachute activity.
Review airport information before flight and never assume every aircraft will follow the same rectangular path.
Watch for Wake Turbulence
Wake turbulence can be a concern when following a heavier aircraft.
Consider:
- Aircraft size
- Wind direction
- Touchdown point
- Rotation point
- Flight path
- Time or distance spacing
- Controller instructions
A student should understand where wake vortices are likely to move and avoid taking off or landing through a stronger aircraft’s wake.
When uncertain about spacing, delay the operation or request additional separation.
Use Checklists Without Losing Control
Students sometimes spend too much time looking down while completing landing checks.
A safer method is:
- Maintain aircraft control.
- Confirm traffic position.
- Complete a short section of the checklist.
- Look outside again.
- Verify configuration.
- Continue monitoring the pattern.
Memorised flows may support cockpit organisation, but important items should still be verified using the approved checklist.
The order of priorities remains:
Aircraft control, collision avoidance, flight path, communication, and checklist completion.
Keep Turns Coordinated
All pattern turns should be smooth and coordinated.
Avoid:
- Excessive bank
- Excessive rudder
- Pulling to tighten a turn
- Allowing airspeed to decay
- Fixating on the runway
- Continuing a poor base-to-final turn
Bank angle, load factor, and angle of attack are closely related. Pulling during a steep turn can bring the aircraft closer to a stall even when the indicated airspeed appears higher than the familiar wings-level stall speed.
If the aircraft overshoots final, go around rather than forcing alignment.
Know When to Extend Downwind
Downwind may need to be extended because of:
- Landing traffic
- Controller instruction
- Runway occupancy
- Spacing behind another aircraft
- Wake turbulence
- An aircraft on final
- Training requirements
When extending downwind:
- Maintain altitude unless instructed otherwise
- Maintain awareness of the airport
- Monitor fuel and aircraft position
- Avoid entering restricted or unsuitable areas
- Do not allow the runway to disappear from awareness
- Reassess whether the approach remains practical
At a towered airport, do not turn base until cleared or instructed when the controller has directed an extension.
At a non-towered airport, coordinate clearly and avoid creating confusion for following aircraft.
Practise Go-Around Integration
A go-around is part of traffic-pattern training, not an unrelated emergency manoeuvre.
Common reasons include:
- Unstable approach
- Poor spacing
- Runway obstruction
- Aircraft still on the runway
- Excessive drift
- Missed final alignment
- Balloon or bounce
- Controller instruction
- Loss of visual reference
- Any uncertainty about landing safely
After initiating a go-around:
- Apply power according to the aircraft procedure
- Control pitch and yaw
- Manage configuration in the approved sequence
- Establish a safe climb
- Maintain traffic awareness
- Communicate intentions
- Rejoin or leave the pattern as instructed or appropriate
The pilot must anticipate conflicts with aircraft taking off, on crosswind, or following on final.
Common Traffic-Pattern Mistakes
Entering at the Wrong Altitude
Problem: The aircraft may conflict with traffic already established in the pattern.
Improvement: Confirm the published altitude before flight and enter level whenever practical.
Using the Wrong Pattern Direction
Problem: The aircraft may fly head-on against established traffic.
Improvement: Check charts, airport information, visual indicators, radio traffic, and controller instructions.
Flying Too Close to the Runway
Problem: Base and final become steep and rushed.
Improvement: Use consistent downwind spacing adjusted for wind and aircraft type.
Flying Too Wide
Problem: The pattern becomes inefficient and may conflict with other traffic or reduce gliding options.
Improvement: Maintain a practical distance that supports a stable approach.
Forgetting Wind Correction
Problem: The rectangular pattern becomes distorted and the aircraft may overshoot final.
Improvement: Plan the heading needed for each leg based on wind direction.
Fixating on the Runway
Problem: Traffic, altitude, airspeed, and coordination may be ignored.
Improvement: Maintain a structured outside scan.
Turning Base Too Late
Problem: The aircraft overshoots final and may require excessive manoeuvring.
Improvement: Anticipate groundspeed and begin the turn using suitable visual references.
Descending Too Early
Problem: The aircraft may become low on base or final.
Improvement: Maintain pattern altitude until the approved descent point.
Poor Radio Discipline
Problem: Other pilots cannot build an accurate picture of the aircraft’s position.
Improvement: Use standard, brief calls with clear position and intentions.
Following Too Closely
Problem: The student may become rushed or encounter wake turbulence.
Improvement: Extend or adjust spacing while maintaining clear communication.
Continuing an Unstable Approach
Problem: The student attempts to save a poor pattern with aggressive corrections.
Improvement: Make an early go-around decision.
Practical Training Plan
Ground Briefing
Review:
- Pattern diagram
- Leg names
- Pattern direction
- Altitude
- Entry and departure procedures
- Radio calls
- Wind correction
- Landing checks
- Go-around procedure
Instructor Demonstration
Observe how the instructor:
- Selects visual references
- Maintains spacing
- Divides attention
- Uses trim
- Corrects for wind
- Times configuration changes
- Communicates
- Decides when to turn
Guided Student Practice
Initially, the instructor may handle some communication while the student concentrates on aircraft control and visual positioning.
As proficiency improves, the student can gradually manage:
- Radio calls
- Checklist flow
- Spacing
- Traffic sequencing
- Approach decisions
Pattern Variations
Under instructor supervision, practise:
- Left and right patterns
- Different wind directions
- Touch-and-go landings
- Full-stop landings
- Planned go-arounds
- Extended downwind
- Different runway layouts
- Towered and non-towered operations
Post-Flight Debrief
Discuss:
- Was pattern altitude accurate?
- Was runway spacing consistent?
- Were turns coordinated?
- Was wind correction effective?
- Were radio calls timely?
- Was traffic identified correctly?
- Was the approach stable?
- Should any landing have become a go-around?
Example Training Scenario
A student approaches a non-towered airport and hears two aircraft making pattern calls.
One aircraft reports downwind, while another reports a long final. The student joins downwind without visually locating either aircraft and assumes the radio calls provide enough separation.
As the student prepares to turn base, the aircraft on long final is now approaching the runway. Turning base would create a conflict.
The safer response is to maintain visual awareness, extend downwind or leave the immediate sequence as appropriate, communicate clearly, and avoid turning in front of established traffic.
The lesson is that radio information supports situational awareness, but it never replaces visual confirmation and safe spacing.
Quick Traffic-Pattern Checklist
Before Arrival or Departure
- Airport information reviewed
- Runway confirmed
- Pattern altitude known
- Pattern direction known
- Frequencies selected
- Wind checked
- Special procedures reviewed
- Go-around plan understood
Entering the Pattern
- Correct altitude
- Existing traffic identified
- Entry does not disrupt flow
- Radio call made when appropriate
- Airspeed controlled
- Lookout maintained
Downwind
- Pattern altitude maintained
- Runway spacing correct
- Landing checks complete
- Wind correction applied
- Traffic monitored
- Base turn planned
Base
- Airspeed controlled
- Descent stable
- Configuration correct
- Turn coordinated
- Final checked for traffic
- Overshoot risk assessed
Final
- Runway aligned
- Approach speed correct
- Descent path stable
- Crosswind correction maintained
- Runway clear
- Go-around available
This checklist is for educational revision only. It does not replace the aircraft checklist, approved operating manual, airport procedures, instructor guidance, or aviation regulations.
Frequently Asked Questions
What are the main legs of a traffic pattern?
The main legs are departure or upwind, crosswind, downwind, base, and final approach.
What is the difference between a traffic pattern and a circuit?
They generally describe the same organised flight path around an airport. “Traffic pattern” is widely used in the United States, while “circuit” is common in several other countries.
Are all traffic patterns flown to the left?
No. Some runways use right-hand patterns because of terrain, obstacles, noise restrictions, parallel traffic, or local procedures.
What altitude should a student use?
Use the pattern altitude published for the airport or assigned by air traffic control. Do not assume one altitude applies everywhere.
How should a student enter a non-towered pattern?
Use the entry recommended or required by the local aviation authority and airport procedure. A 45-degree entry to downwind at pattern altitude is common in some systems, but it is not universal.
Is a radio required at every non-towered airport?
Requirements vary by country, airspace, aircraft, and airport. Even when radio use is not compulsory, students must remain alert for aircraft that may not be transmitting.
When should the base turn begin?
The turn should be based on spacing, wind, aircraft performance, traffic, and instructor guidance. Avoid using a rigid timing rule without considering conditions.
What should a student do after overshooting final?
Do not tighten the turn using excessive rudder, bank, or back pressure. Maintain control and initiate a go-around when safe alignment cannot be achieved.
Can a pilot make a straight-in approach?
Rules vary by jurisdiction. Where permitted, a straight-in approach should not disrupt aircraft already established in the pattern and does not remove the need for lookout and coordination.
What is the most important traffic-pattern habit?
Maintain aircraft control while continuously scanning for traffic. Predictable flying and clear communication help, but every pilot remains responsible for avoiding conflicts.
Conclusion
Traffic-pattern training teaches student pilots how to combine aircraft control, planning, communication, lookout, wind correction, and landing preparation. Consistency is important, but students must also learn to adjust the pattern for traffic, weather, aircraft performance, and local procedures. A safe pilot enters at the correct altitude, maintains suitable spacing, flies coordinated turns, communicates clearly, and goes around whenever a stable landing cannot be assured.
Aviation Safety Disclaimer
This article is intended for general aviation education only. It does not replace instruction from a qualified flight instructor, an approved training syllabus, the Aircraft Flight Manual, Pilot’s Operating Handbook, official charts, airport procedures, checklists, or applicable aviation regulations.
